Square is a free point-of-sale (POS) app that uses a credit card reader and your phone or tablet to process payments. It offers both all-purpose and industry-specific software options with features like inventory management, customer directories, and sales reports to help retailers manage their business. Setting up a Square account is quick and easy, even for new business owners, but if you need more help, follow this simple guide to get you started.
1. Choose Which Square POS Is Right for You
This guide focuses on Square’s flagship product: Square POS. It’s a general-purpose POS that’s our top pick for the best POS for small businesses. However, Square also has three other POS products: Square for Retail, Square for Restaurants, and Square Appointments. Though the examples in this guide are from Square POS, the setup process is very similar across all of Square’s POS products.
Click through the tabs below to learn more about each Square POS product:
2. Consider the Best Hardware Option for Your Business Type
It’s possible to use Square POS without purchasing any additional hardware. You can key in orders on your phone using the POS app or through the virtual terminal on Square Dashboard. If you set up Square Online, you can also set up QR codes and online payments. However, if you plan on accepting in-person payments, we recommend purchasing at least a chip card reader.
Square Hardware Options At-a-Glance
3. Sign Up for a Free Square Account
The first step in using Square POS is setting up your free Square account. Many business owners worry about how to set up a POS system because some solutions require professional installation, separate merchant account applications, or other lengthy and expensive processes.
But with Square, the process is very fast, and once you complete each step, you can set up your store and start selling right away—there’s no waiting for approval. Plus, you can change any information you enter at signup later on, so don’t sweat the details.
Visit Square’s website and click “Get Started.” Then the below screen will appear. Enter your email address, create a password, and select your country. Then continue to the next step.
Tip: Choose a secure password with numbers and symbols because you will also need to enter your banking information and Social Security number.

Step 1 in creating a free Square account is entering your email address and creating a password. (Source: Square)
4. Select Your Merchant Type
Next, Square will ask you for your merchant type:
- Individual: For sole proprietorship and persons accepting payments from casual or occasional sales.
- Business: For businesses accepting payment as a business entity, whether partnership, LLC, corporations, nonprofit, or religious organization.
Then, enter your business or personal name so customers know who they are paying.
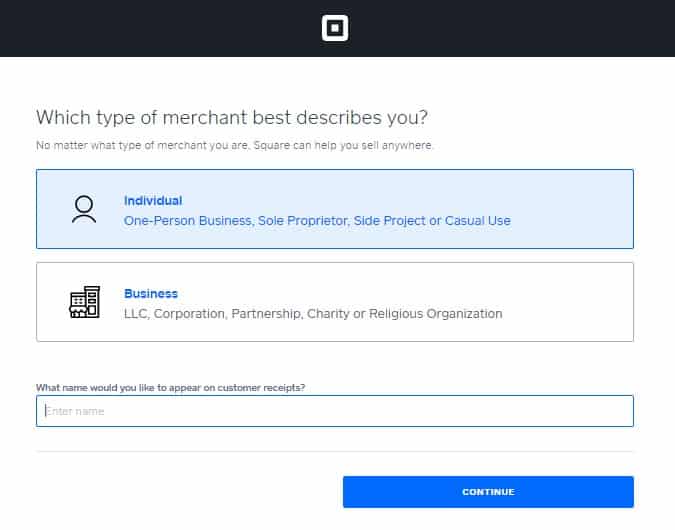
Specify your merchant type and business name. After setup, you can always go back and change your business name in the Square Dashboard under “Accounts & Settings.” (Source: Square)
Once you have your login, if at any point you accidentally close out of the Square screen, your session times out, or you click the refresh button, you will resume setup through your Square Dashboard. There will be prompts to walk you through any missing information.
5. Choose Your Business Type
On the next screen, you will need to select what kind of business you run. Options include:
- Clothing and accessories
- Specialty shop (retail)
- Events/festivals (leisure and entertainment)
- Outdoor markets (retail)
- Food truck/cart
- Outdoor markets (food and drink)
- Art, photo, and film
- Jewelry and watches
- Caterer
- Events/festivals (casual use)
- Outdoor markets (casual use)
- Independent stylist/barber
- Hair salon/barbershop
- Beauty salon
- Massage therapist
- Specialty shop (food and drink)
- Bakery
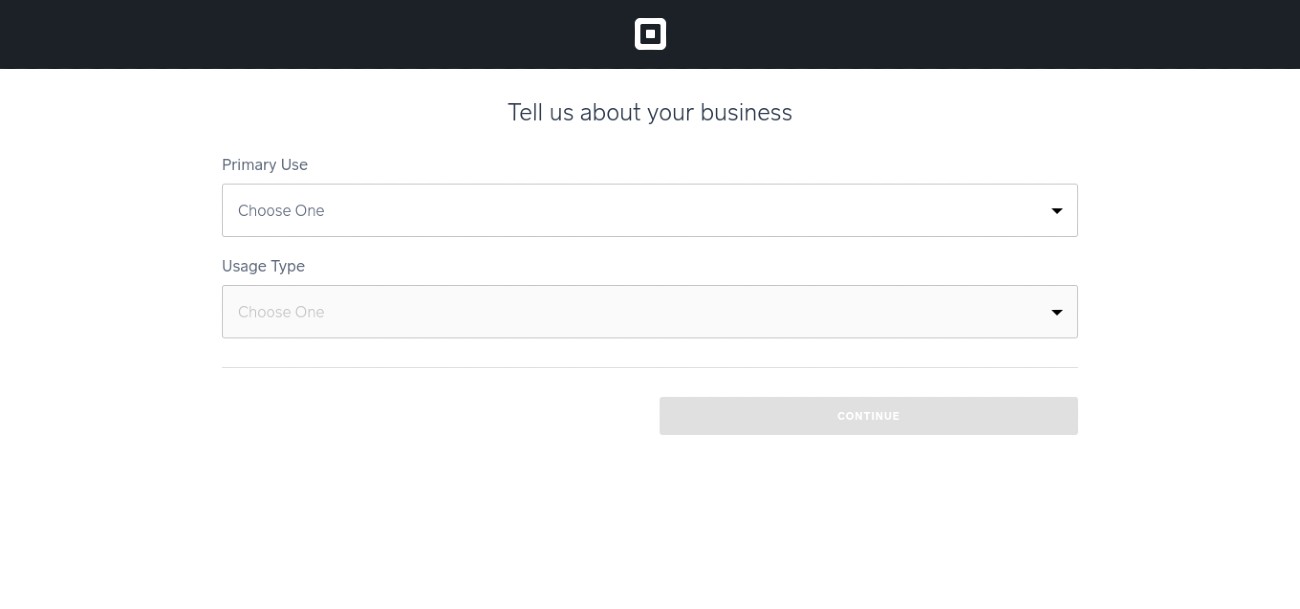
If you don’t see an option that describes your business, select “I Don’t See My Business Type.” You’ll then be able to choose a more general option from a drop-down menu. (Source: Square)
Square asks you to pick your specific business type because there are free software options for different needs. Standard Square POS is great for occasional or general POS use. There are also dedicated retail, restaurant, and appointment-based options. Within each software, there are also different templates and settings for even more specific business types such as events or catering.
6. Choose How to Accept Payments
Every account comes with the default option to ring up in-person sales through the POS app. You can also opt to set up a virtual terminal, invoicing, online sales, and donations for free. You can also offer customers the option to pay with gift cards.
You can set up e-gift cards for free through Square POS, though you’ll pay 2.9% plus 30 cents for every electronic gift card you sell. Square also offers options for physical gift cards, depending on your need.
You can add, adjust, or remove any of these features at any time.
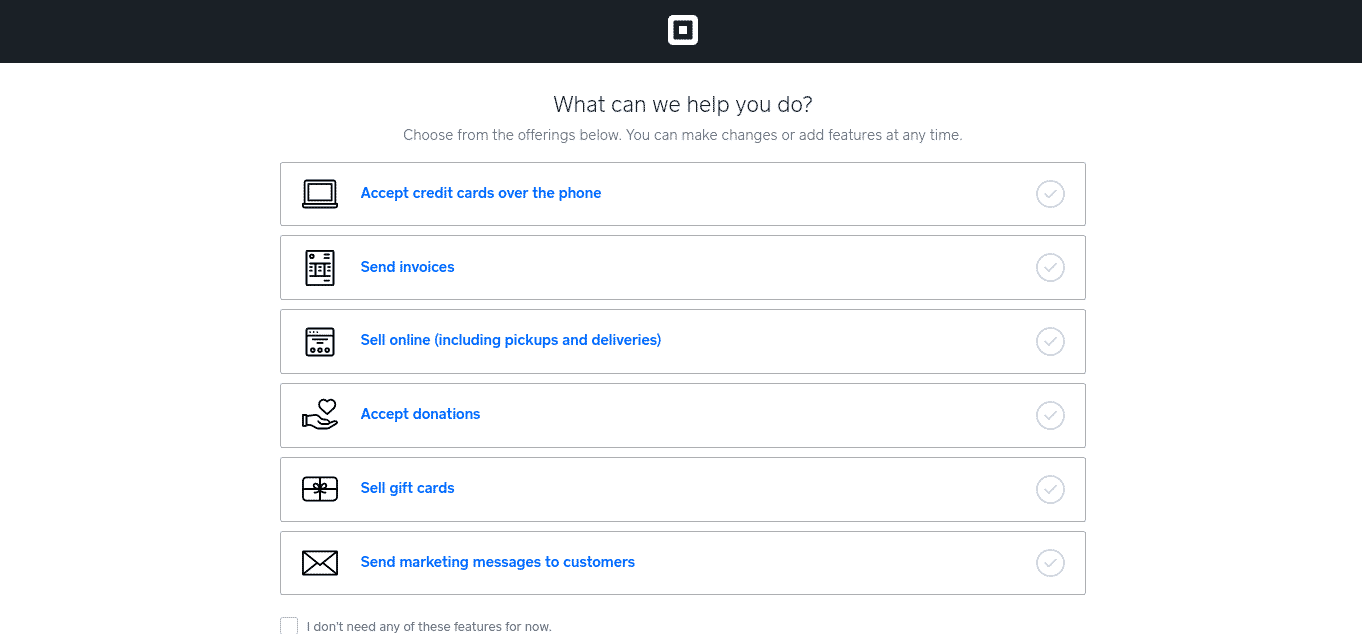
For this demo, we selected “Sell online.” (Source: Square)
With Square Online, “Sell online” means more than just ecommerce sales. Choosing this option also allows you to offer order-ahead, curbside pickup, and contactless in-store ordering with QR codes.
We recommend most businesses choose the sell online add-on because:
- It’s free (Square Online is free with every Square POS account)
- Pickup orders reduce in-store crowding
- More options allow customers to shop according to comfort levels and preferences
For information on pricing for different add-ons and upgrades, read our Ultimate Guide to Square Fees & Pricing.
7. Verify Your Identity
Even though Square doesn’t have an application process for merchant services, it still needs to verify your identity before you can process payments. The process is instant—you’ll just need to provide your name, address, birthday, phone number, and last four digits of your Social Security number. And there’s no credit check involved.
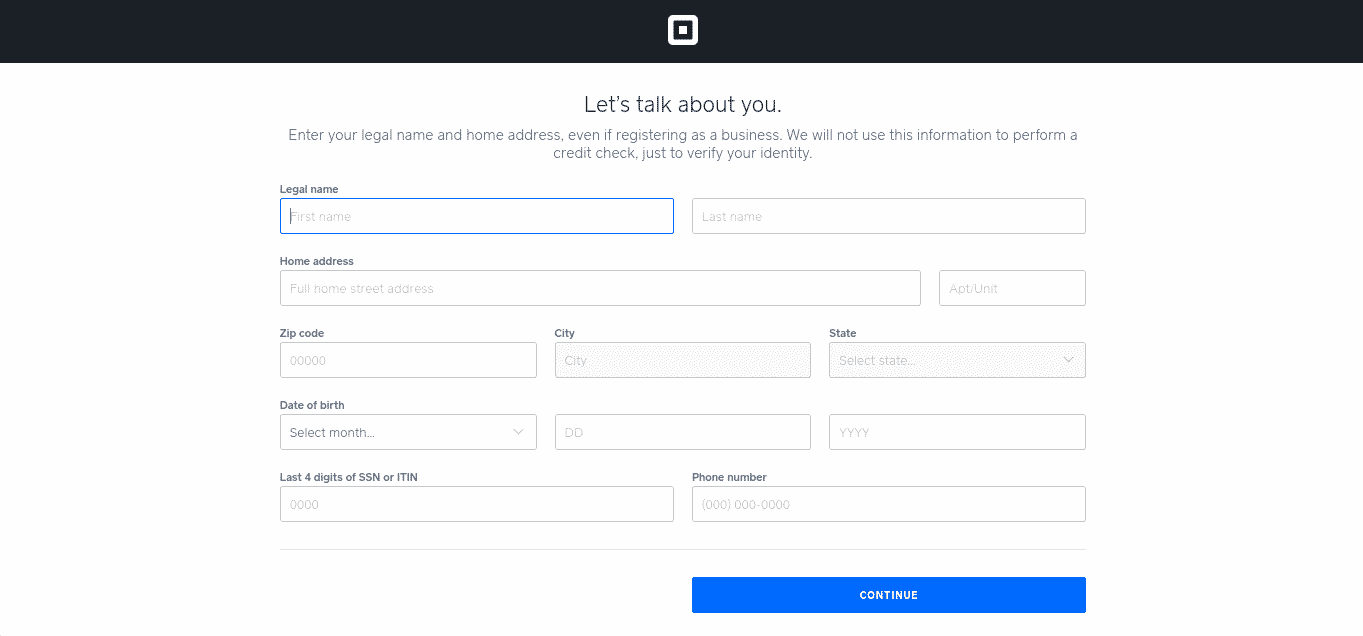
The system will only ask you for the last four digits of your SSN. However, once you hit continue, it verifies your details and, in some instances, will ask for a full SSN. (Source: Square)
8. Select a Business Location
After entering your personal identification information, choose where your business will be operating: home, on-the-go, or a different location.
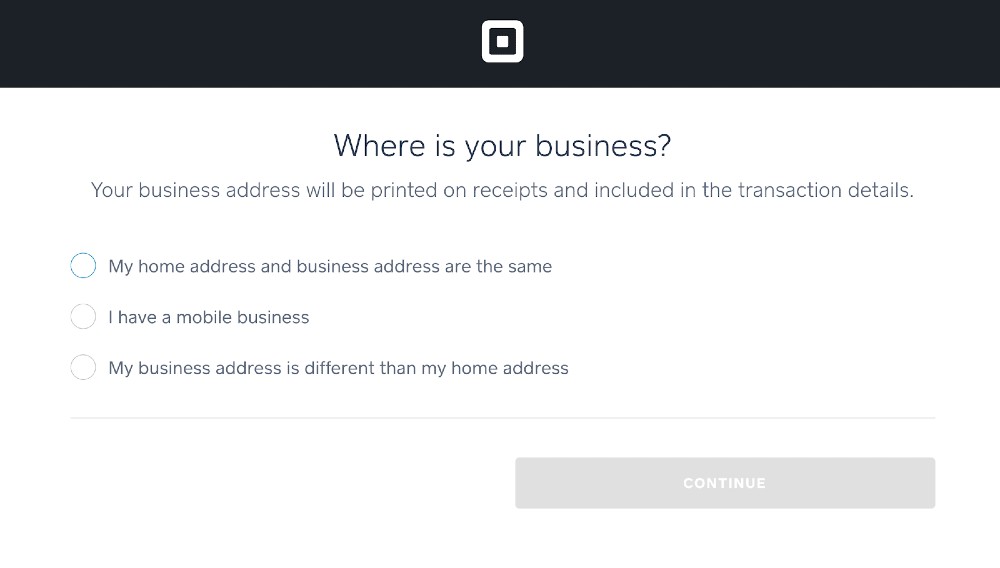
For this demo, we chose the “home address” option. (Source: Square)
9. Select a Deposit Speed
When setting up your deposits, you can also choose how fast you want to receive funds. There are two options to choose from:
- Next business day: Your funds will be deposited within one to two business days free of charge.
- Same-day: Receive your funds instantly at the close of your business day for a 1.5% fee of the total deposit amount.
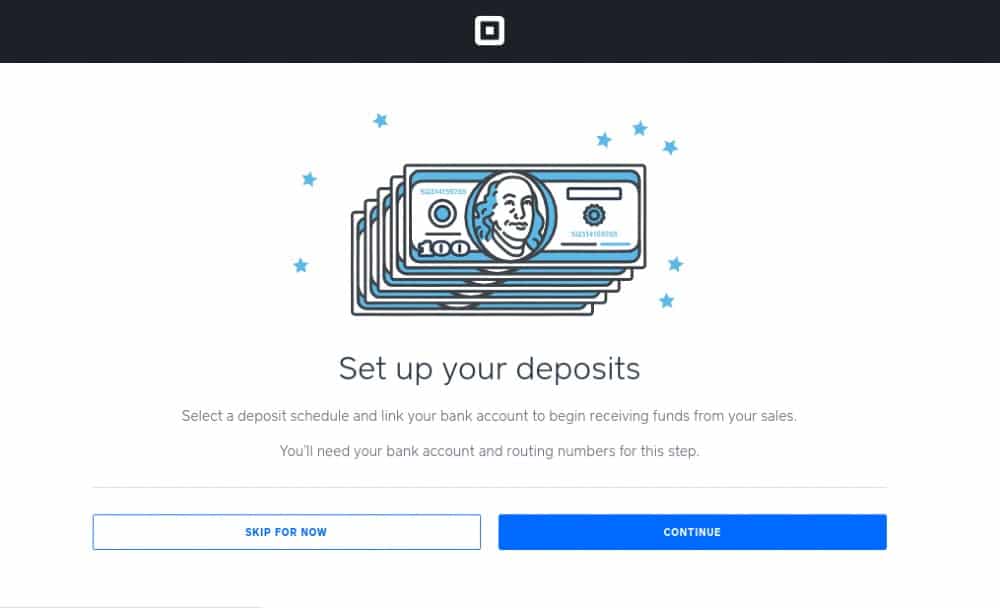
For this demo, we chose the free option. If you don’t have your bank account and routing numbers on hand, you can skip this step and add them later. (Source: Square)
You can adjust deposit options and schedules at any time in your Square Dashboard. Deposits can be scheduled or manually pushed through. So, even if you opt for scheduled, free next-day deposits, if you ever need funds right away, you can request a same-day deposit for a 1.5% fee through the Square Dashboard.
10. Link Your Bank Account
Connect the bank account where you want to receive the deposits. To verify your account, Square will withdraw and then redeposit a one-cent charge. Verification can take up to four business days. Until your bank account is verified, any funds from sales will be held in your Square Balance.
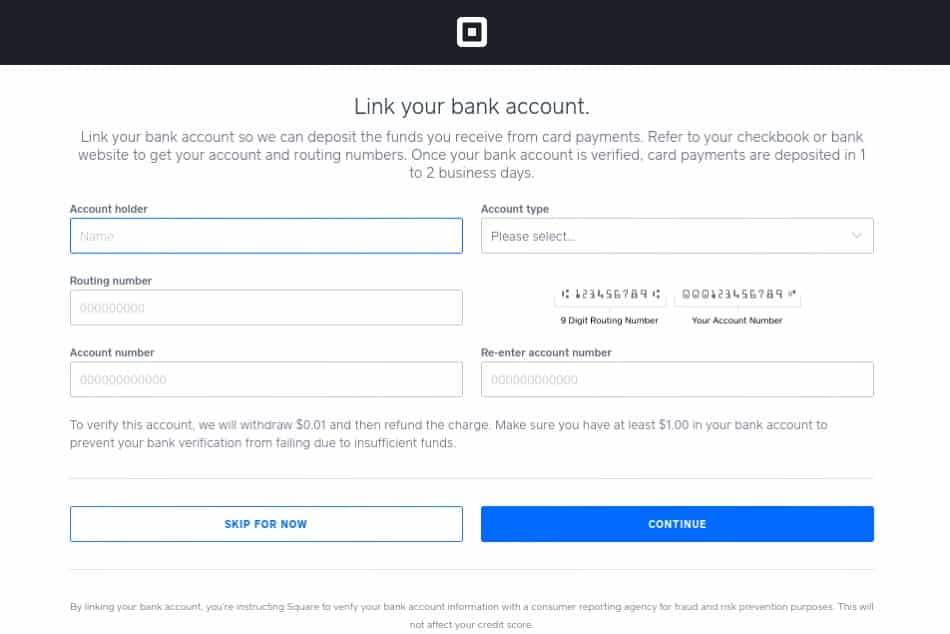
It’s important to link your business bank account with Square so that you can deposit the money you make from sales. (Source: Square)
Square has launched its own banking service called Square Banking, where you can sign up for a checking or savings account like with traditional banks. Having a Square banking account allows you to automatically transfer sales into your account ready to spend with your debit card—digitally or in person. Visit Square Banking to learn more.
11. Set Up Add-Ons
Remember in Step 6 where you selected additional payment methods, like online payments and invoices? The last step is setting those up. If you choose “Sell online,” you’ll be able to pick from four options: a single shopping page, a shoppable Instagram page, a full website and online store, or checkout links.
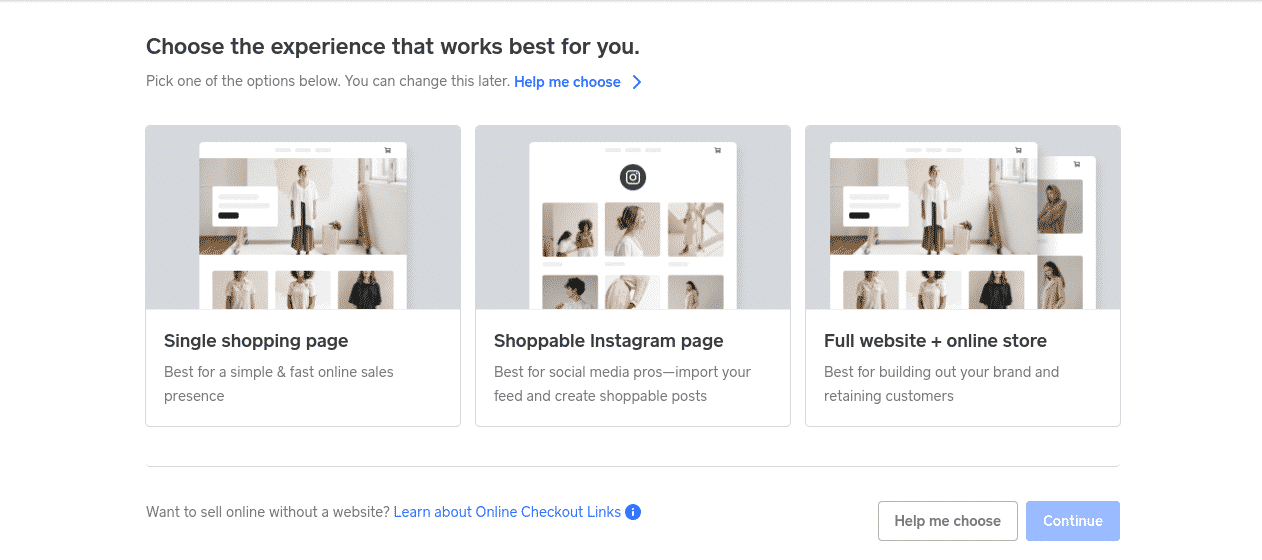
Choose to start a free online store, checkout page, shoppable Instagram page, or checkout links with Square Online. (Source: Square)
This selection isn’t permanent and can be changed at any time. If you’re not sure what you need, Square has a prompt to help you decide. It will ask if you have an existing website, how many items you sell (a few or a lot), and to choose a statement that best describes what you want. If you’re not sure, Square recommends opting for a single shopping page, which you can always expand later.
How to Get Started With Square POS
After creating your account, you can choose POS hardware, configure your product and service lists, adjust business settings (like taxes and operating hours), and begin accepting payments. In step No. 2 we discussed identifying the right Square hardware for your business, which you can either purchase outright or in installments. Every new Square account also comes with a free magstripe reader that will arrive in the mail.
Square also offers no-interest financing for qualified hardware purchases for orders between $49 and $10,000 which can be split into an installment payment plan of up to 24 months.
Set Up Your Product List
Square inventory management software comes free with your Square account, and you’ll need to add your products or services into the system before you can process transactions from your POS. There are two options for setting up product lists in Square:
- Create individual items
- Import items in bulk
If you only have a few products or are just starting out as a new business, you can go ahead and add products individually.
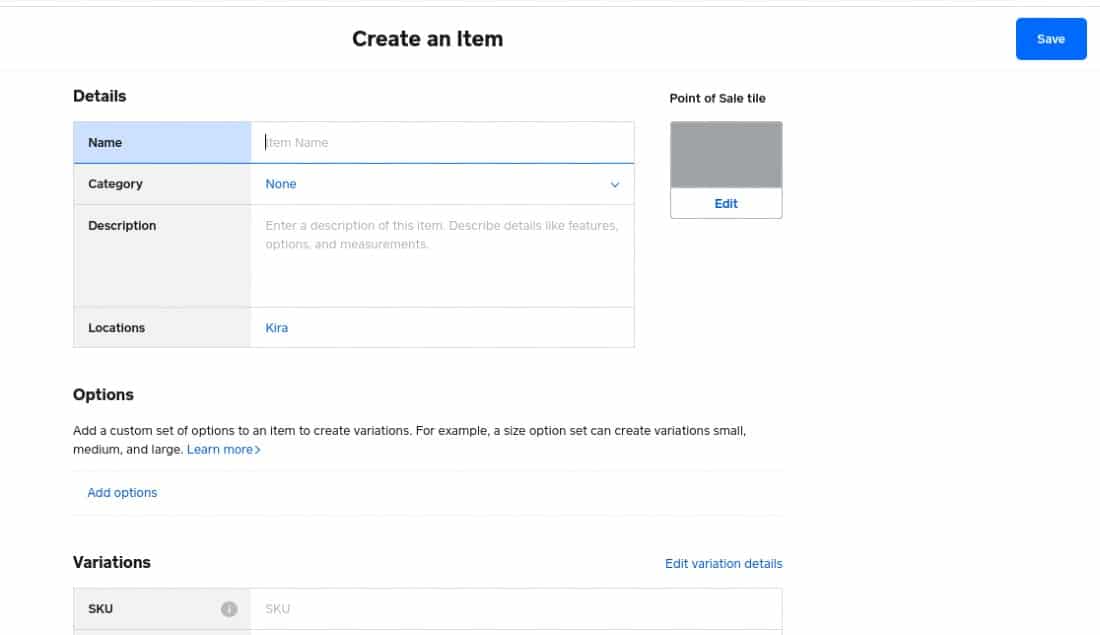
Add as few or as many product details as you need, including descriptions, photos, variants, modifiers, and more. These options can carry over to your Square Online store as well. (Source: Square)
To learn more about managing products in Square, read our full step-by-step Square Inventory guide.
Adjust Store Settings
The Accounts & Settings section of your Square Dashboard is where you can change your business name, edit bank account information, set up custom email notifications, manage transfers and deposits, customize your receipts, view tax forms, create contracts (such as credit card authorization forms), and manage hardware.
Click through the tabs below to learn more about each setting:
In your Square Dashboard, under Accounts & Settings > Security, you can enable Team Permissions. This allows you to set up restrictions for team members on a number of different functions, which will apply to all POS devices.
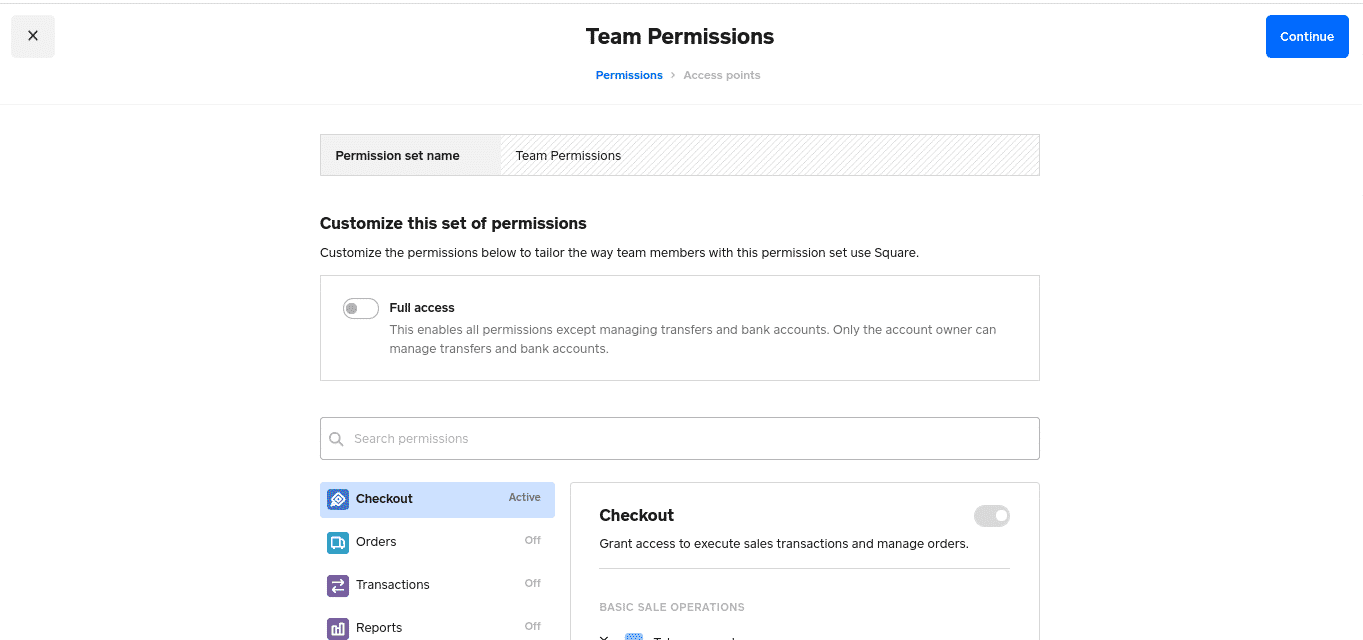
You can set permissions for each role or toggle the “Full access” switch to give your employees access to all the management tools except for banking and accounts. (Source: Square)
Adjustable team settings include:
- Use virtual terminal
- Cancel transactions
- Adjust taxes manually
- Void transactions
- View completed transactions
- View reports
- Add, edit, and delete customer data
Choose what reporting and transaction emails you want to receive and opt in or out of emails from Square. Square has options for daily, monthly, and annual sales summaries. However, you can’t customize the reports emailed to you.
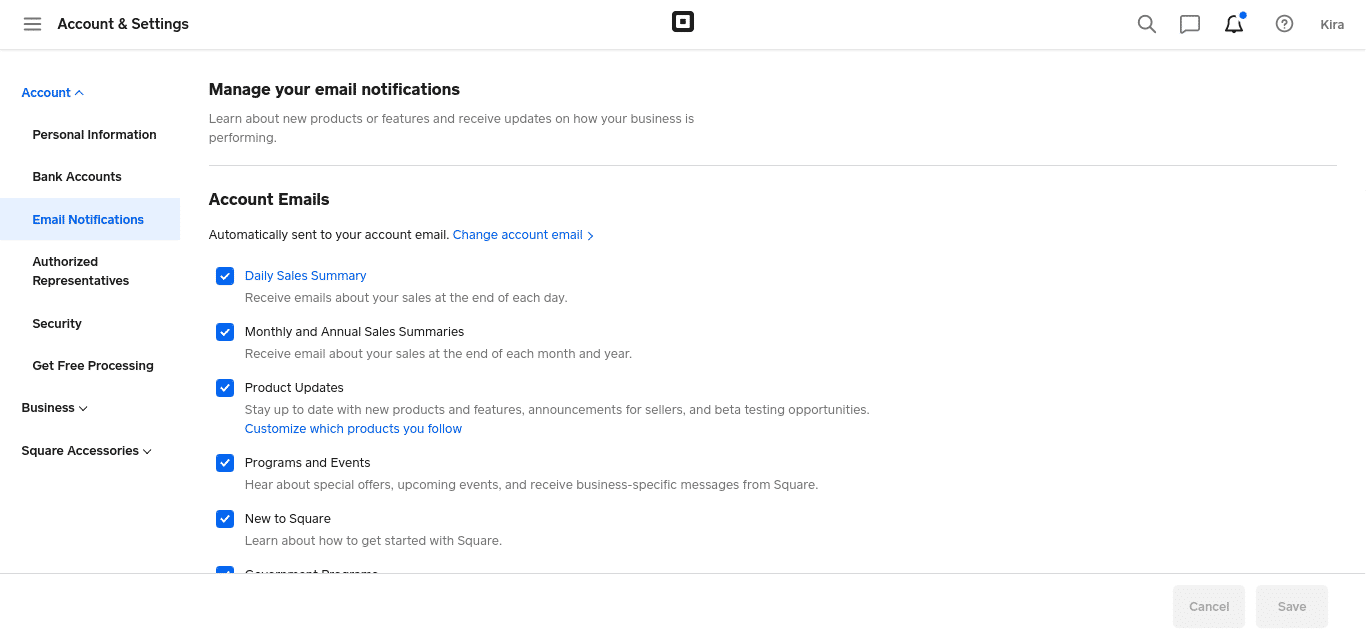
Choose which reports and transaction notifications you want to receive via email.
Add your logo and brand colors, choose what information to display, add a return policy, and add social media handles. We recommend adding itemized receipts, a clear return policy, and contact information.
Add your taxpayer information, including your business name and employer identification number (EIN). Square will automatically file 1099-K forms for you when you reach the earnings threshold ($20,000 or 200 payments in most states).
1099-K forms are what credit card processing companies submit to the IRS to report the earnings of its merchants. Once you cross the reporting threshold, you can view your 1099-K forms in the Square Dashboard.
If you set up payroll through Square, you’ll also be able to view your W-2, 940, and other payroll forms in the Square Dashboard, which Square will also automatically submit for you.
Contracts are one of Square’s newer features. Within the Square Dashboard, there are templates for:
- Credit card authorization forms
- Service agreements
- Sale of goods
- Completion of service
- Confirmation of delivery
- COVID-19 agreement
Contracts are not necessary for every brick-and-mortar business, but if you sell services or expensive made-to-order goods, charge subscriptions or have recurring billing, or offer retail delivery, they may be a good fit for you.
Secure your Square account by providing additional business details. The more Square knows about your business, the better it can manage your merchant services in terms of fighting chargebacks and preventing processing limits.
Download the Square POS App
After downloading the Square POS app from the Apple App Store or Google’s Play store, log in to your account using the email and password you set up earlier. Immediately after that, you’ll be prompted through a test transaction.
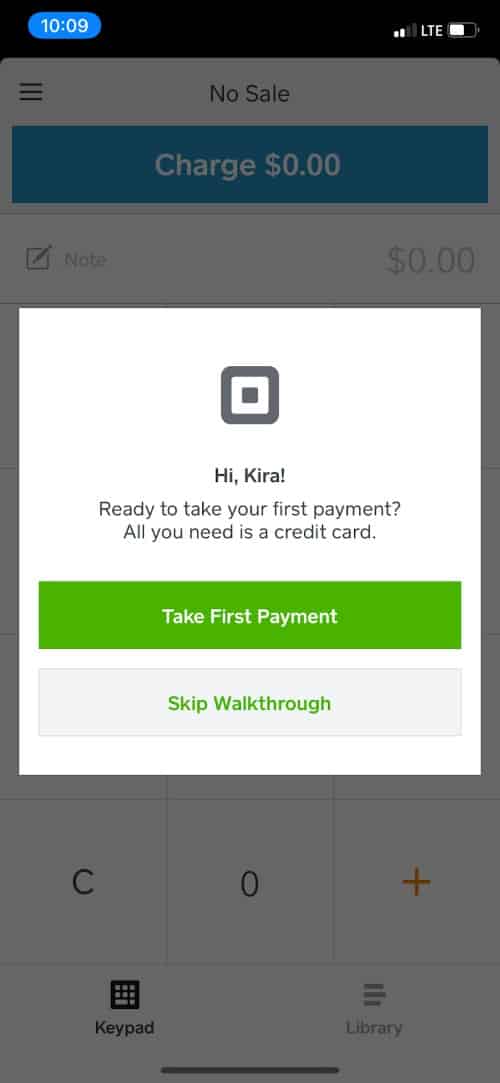
Square has tutorials that will prompt you through test transactions. (Source: Square)
Select a Product to Sell
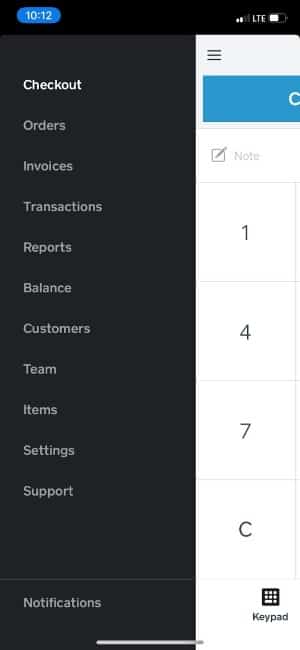
When you’re ready to make a sale, select “Checkout” at the top of the left-hand menu. Then you can either enter a dollar amount or select the list icon at the bottom of the screen to ring up one of the preset inventory items you created. We recommend using this method if you have physical products with inventory to track.
Click the “Charge” Button
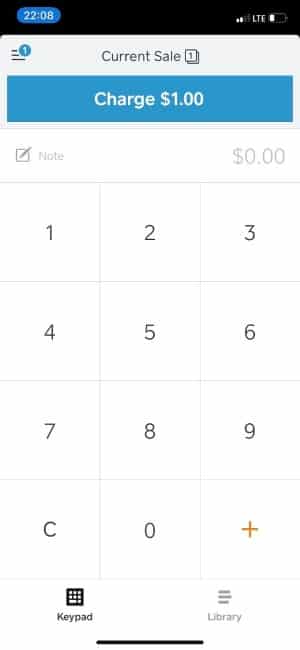
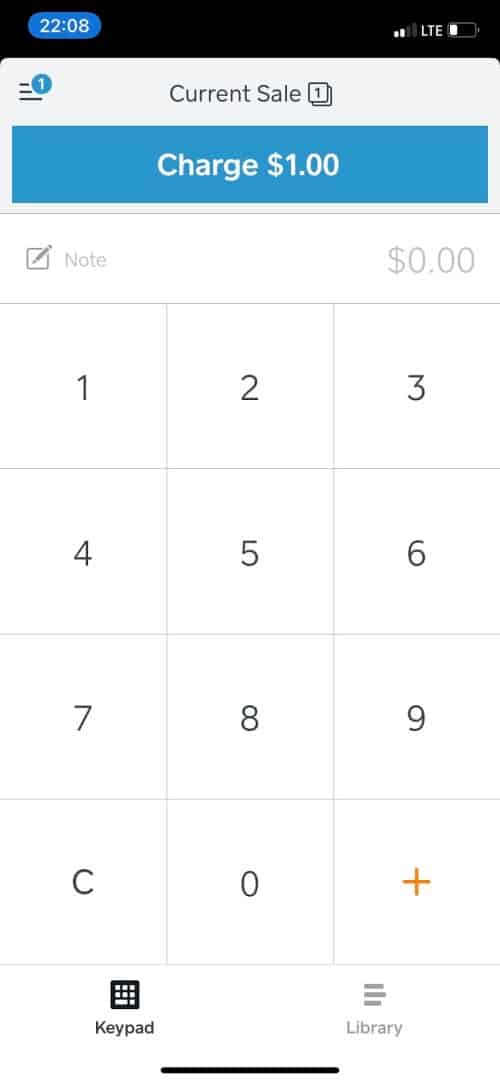
To process a transaction, go to “Checkout” and then enter a dollar amount or select an inventory item.
(Source: Square)
Once you have the transaction amount or appropriate products entered, simply click the “Charge” button, which will take you to the payment screen. At this point, you can also apply loyalty rewards or discounts.
Choose a Payment Option
There are multiple payment options to choose from. If you have a connected card reader, you can go ahead and swipe the payment card. You can also type in a credit or gift card number, send an invoice, use a credit card stored on file, or accept cash or check.
Square offers multiple payment methods. (Source: Square)
Select a Receipt Option & Complete the Sale
Once you have completed the payment, Square gives your customer the option of what kind of receipt they would like. You can send an email or text receipt or simply select “No Thanks” if your customer doesn’t need a receipt. The system will store their email or number so that they don’t have to provide it every time they pay a vendor that uses Square POS.
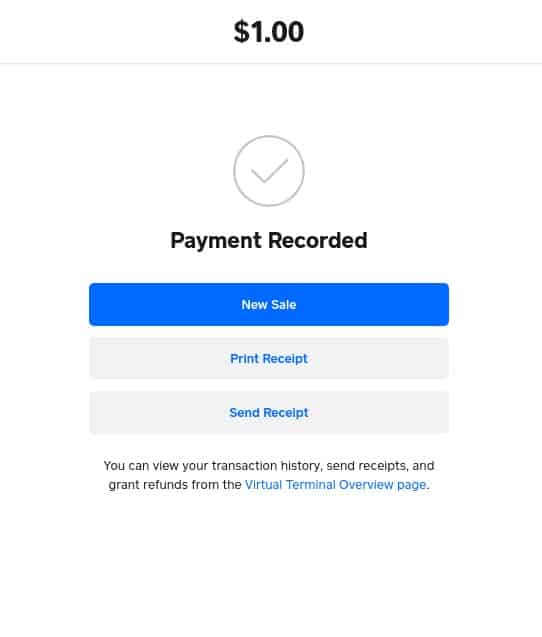
Aside from printed forms, Square also offers digital, text, and email receipts. (Source: Square)
Collect Customer Feedback
Once you’ve processed your first sale, start collecting customer feedback. On every digital receipt, customers will be able to rate their experience along with a reason. You’ll see this feedback immediately in your Square Dashboard or POS app. You can have private conversations with your customers on their experience, issue partial or full refunds, and see that customer’s history with your business.
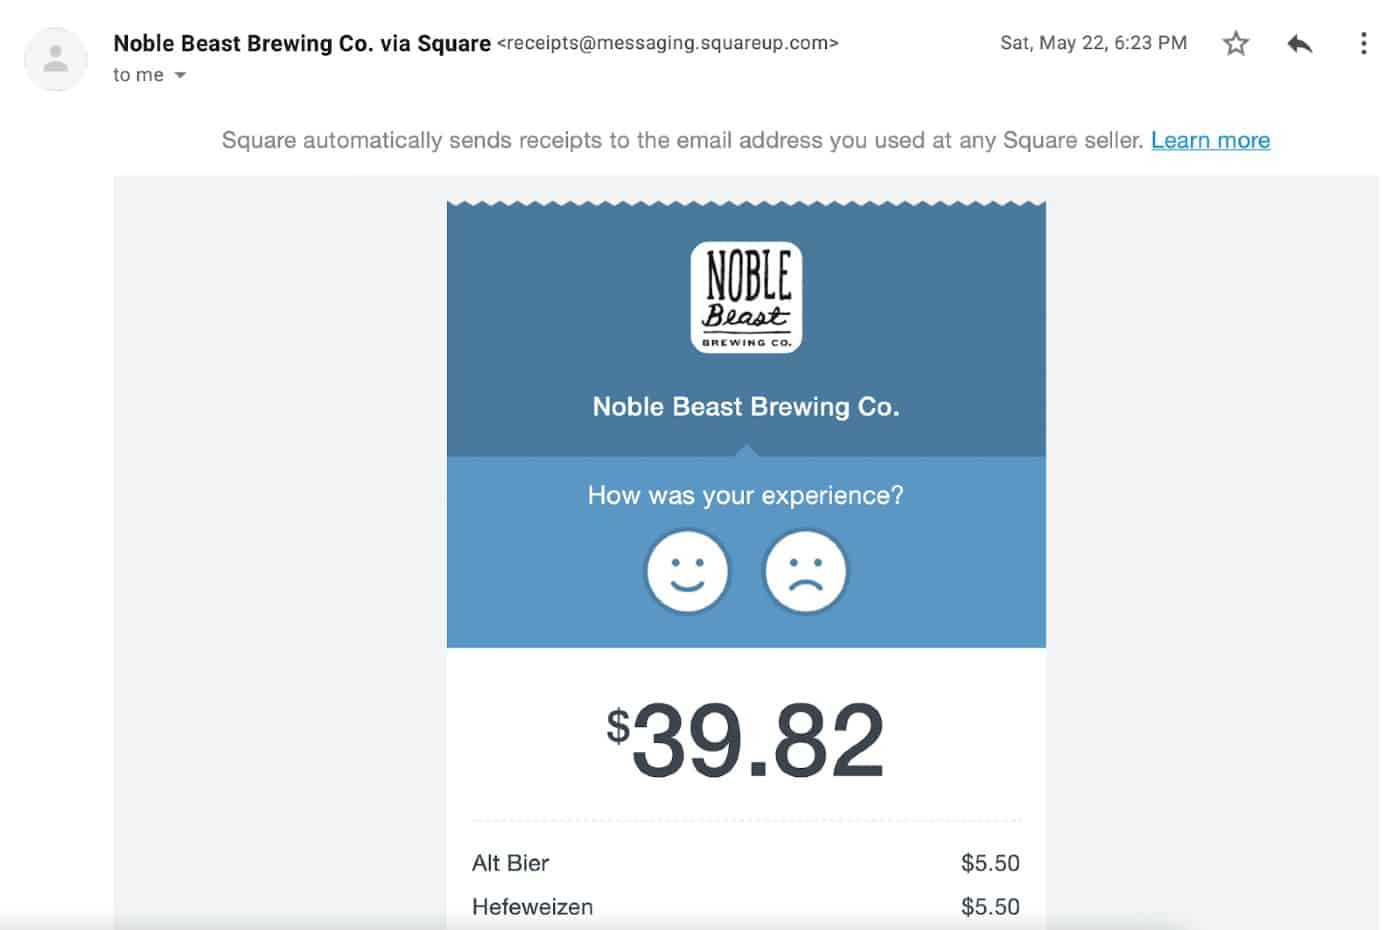
Customer feedback is a free, built-in tool in Square’s POS software. (Source: Square)
From the Dashboard, you can view feedback trends so you can spot opportunities to improve. By having customers leave feedback from their receipt, business owners can respond immediately and privately, instead of learning about the customer’s experience from a public review site.

Spot trends in customer feedback to see what customers love most about your business and identify areas of opportunity. (Source: Square)
Set Up Email Marketing
If you want to create an email marketing campaign for your business, you can purchase a Square marketing subscription. Pricing ranges from $15 to $35 per month, depending on your number of contacts. If you don’t need to send marketing emails often or only want to reach a small number of customers, you can also pay 10 cents per marketing email.
Before creating a marketing campaign, review your customer email subscription list for duplicate, old, or missing contacts. You can manage subscribed customers in your customer directory, which you can access through your Square Dashboard.
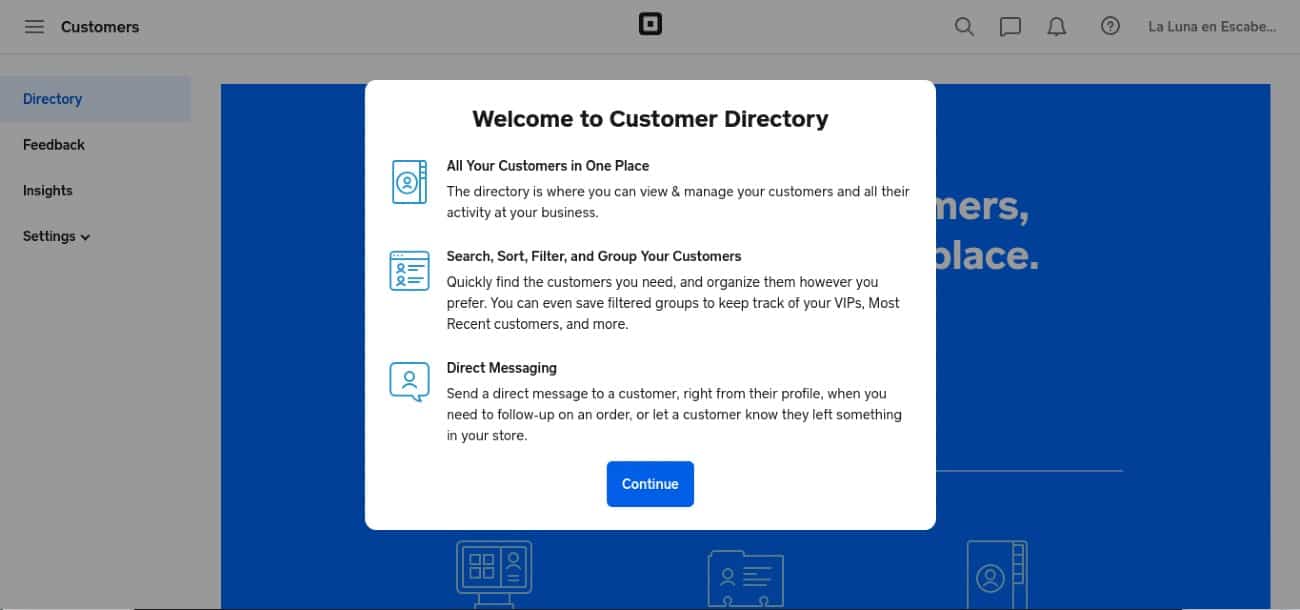
Group and sort contacts, and message customers all from your Customer Directory.
Add Popular Integration Apps
Square has an App Marketplace with a variety of popular third-party business apps that you can integrate to streamline operations. Browse through categories like accounting, invoicing, ecommerce, team management, inventory, and more. You can also check out its collections, each with bundles of app suggestions tailored to your specific needs. There are collections for restaurants, retail, beauty/personal care, live video, Square Online, and more.
Popular apps among users include Acuity Scheduling, Linktree, GoDaddy, Wix, WooCommerce, and Mailchimp. While some of these apps are free, others require paid plans.
Bottom Line
Square is a free mobile POS and payment processing app that works on smartphones and tablets. Square makes money by charging flat-rate payment processing fees. In return, businesses receive a suite of free management features, a mobile POS, and competitive credit card processing rates.
It’s easy to set up a free Square account, and it’s even easier to process mobile sales. Best of all, Square is free to use and requires no commitment. Visit Square to set up your own account and test out the app for yourself.
Comments